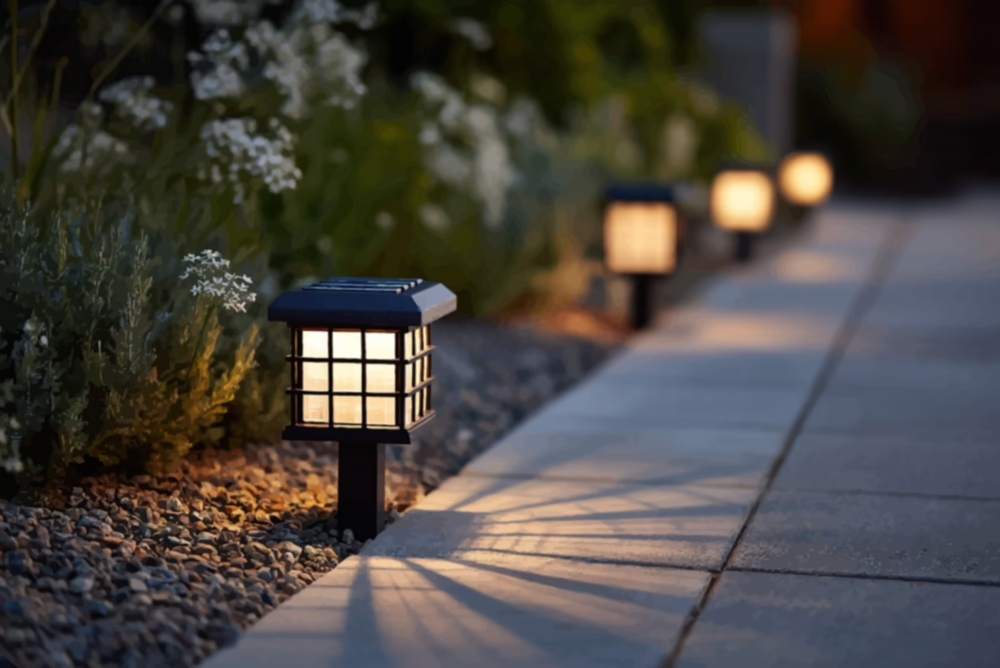

A well-planned outdoor lighting system can completely change a residential property the moment the sun goes down. Many homeowners invest heavily in beautiful stone patios, structural retaining walls, and custom outdoor kitchens. However, without proper night illumination, these high-end exterior architectural features disappear entirely into the darkness. Learning how to integrate low-voltage fixtures directly into stone, brick, and concrete structures makes sure your hardscaping shines 24/7.
When done correctly, hardscape lighting extends the usable hours of your outdoor living spaces, boosts your home’s curb appeal, and improves critical nighttime safety around exterior steps and walkways.
While adding these exterior electrical fixtures might initially seem complicated, modern low-voltage wiring requires minimal technical background and poses virtually zero risk of dangerous electrical shock. By following a structured approach, you can achieve professional-grade landscape lighting results that will last for years.
Designing Your Layout Strategy
Every successful lighting project begins with a thoughtful layout strategy to maximize visual impact. You must identify which structural elements require illumination before purchasing equipment or running a single wire.
Creating a physical map of your yard helps you visualize the final illuminated result. Sketch your outdoor living area on graph paper and mark the exact locations for each planned light source. This visual guide makes calculating wire distances and outdoor lighting transformer sizes significantly easier during the planning phase.
If your project includes illuminating paths, a professional-grade walkway lighting installation in Bucks County, PA can serve as an excellent blueprint for how to highlight stone borders and elevation shifts without creating over-illuminated hot spots.
Pro Tip: Always place fixtures directly under the lip or capstone of a retaining wall whenever possible. This strategic positioning hides the physical light source from direct view while casting a beautiful downward glow across the stone face.
Selecting the Best LED Hardscape Lights
The long-term reliability of your exterior illumination system depends heavily on your choice of hardware. Solid brass or heavy copper fixtures offer superior durability because they actively resist corrosion from moisture, fertilizer, and soil chemicals. Cheaper plastic or thin aluminum alternatives typically degrade quickly under harsh weather conditions, meaning they will require frequent replacement after just a couple of winters.
Pay close attention to the specific color temperature of your selected LED hardscape lights before making a purchase:
- Warm White (2700K-3000K): Ideal for residential applications, providing a cozy, welcoming ambiance that complements natural stone and wood tones.
- Cool White (4000K+): Tends to look clinical or commercial in residential backyards and should generally be avoided for hardscaping.
Modern LED options use up to 90% less energy than traditional incandescent bulbs and last significantly longer. Hardscape fixtures should produce a soft wash of light rather than a harsh, blinding glare. Aim for LED bulbs that output between 50 and 150 lumens per fixture to achieve a subtle, balanced environment.
Sizing Your Low-Voltage Transformer
A low-voltage lighting system relies entirely on a transformer to step down standard 120-volt household current to a safe 12-volt or 15-volt current. To select an appropriately sized power supply, you must calculate the total wattage of all planned fixtures. Simply multiply the wattage of a single LED bulb by the total number of lights on your circuit run.
Electrical experts consistently recommend adding a 20% safety buffer to your final wattage calculation to prevent system strain. For example, if your combined exterior fixtures draw 100 watts, you should purchase a transformer rated for at least 120 watts. This extra capacity prevents the system from overheating and allows for future expansion if you decide to add more lights down the road.
Gathering Essential Tools and Materials
Having the correct equipment on hand prevents frustrating delays during physical assembly. For a standard hardscape lighting project, make sure you have the following tools ready:
- Specialized masonry drill bit and a heavy-duty hammer drill
- Wire strippers and a voltage meter
- Premium outdoor-rated silicone sealant
- A flathead screwdriver and a heavy rubber mallet
For safety and longevity, direct burial wire represents the standard industry choice for outdoor low-voltage connections. A 12-gauge or 14-gauge wire provides adequate copper thickness for most standard residential runs under 150 feet. Thicker electrical wires significantly reduce the risk of voltage drop, which causes lights at the end of a long run to appear noticeably dimmer than those closest to the power source.
If you are tackling an extensive property upgrade, such as a full walkway lighting installation in Montgomery County, PA, investing in high-quality materials makes sure your system handles regional freeze-thaw cycles without breaking down.
Never use standard indoor electrical tape or regular wire nuts for exterior lighting projects. Groundwater will eventually penetrate these weak connections, leading to short circuits and complete system failure. Always use silicone-filled waterproof wire connectors.
Step-by-Step Hardscape Installation Guide
With your plan finalized and materials gathered, you can begin running the electrical lines. Laying out all your components across the lawn before altering any masonry helps you visualize the entire circuit from the transformer to the final fixture.
Make sure to check local building codes regarding exterior low-voltage electrical installations in your specific municipality. Some regions require a licensed electrician to install the exterior GFCI (Ground Fault Circuit Interrupter) outlet that powers your main transformer unit. Once you secure the proper power source, follow these steps in order to achieve a clean, lasting installation.
- Map the Wiring Route
Lay your direct burial wire along the planned route before making any permanent cuts. Leave a small loop of excess wire (a service loop) at each fixture location to provide adequate slack for future adjustments or repairs. Run the main wire behind the retaining wall or underneath the capstones to keep it hidden.
- Mount the Fixtures
Carefully remove the unglued capstones from your wall and place the stainless steel mounting brackets directly on the underlying block. Mark the screw holes, use a masonry bit to drill shallow holes, insert plastic wall anchors, and screw the brackets firmly into place.
- Connect to the Main Wire
Strip a small 1/2-inch section of insulation from the main low-voltage line and the individual fixture wires. Join the connections tightly using silicone-filled waterproof wire nuts, making sure no bare copper is left exposed to the soil moisture.
- Hook Up the Transformer
Mount your transformer to a sturdy post or exterior wall near your GFCI outlet, at least 12 inches above the ground. Strip the ends of your main wire run, insert them into the transformer’s output terminals (typically labeled 12V or 15V), and tighten the terminal screws securely.
- Test and Secure the System
Plug in the transformer and turn the system on to verify that every single light illuminates correctly. Check for even brightness across the run. Once confirmed, apply professional-grade concrete construction adhesive to the wall blocks and place the capstones carefully back over the installed fixtures.
Avoiding Common Installation Mistakes
Even experienced DIY enthusiasts sometimes make critical errors during extensive exterior lighting projects. One major pitfall involves completely ignoring voltage drop across excessively long electrical wire runs.
You can easily mitigate voltage drop by utilizing a center-tap wiring method. Instead of connecting your transformer to the very beginning of a long wire run, connect it to the middle of the run. This technique distributes the electrical load evenly in both directions, keeping the brightness consistent across all your fixtures.
Another frequent point of failure is poor wire splicing. Rushing the connection process can leave small sections of copper wire exposed. According to the National Electrical Code (NEC), proper exterior splices require listed waterproof connectors to prevent dangerous ground faults and early corrosion.
Overcoming Hardscaping Obstacles
Existing concrete walkways often block the ideal direct path for your low-voltage electrical wire. You do not necessarily need to break up expensive concrete to get your wire across the path. A long drill bit or a specialized pipe-driving technique underneath the slab provides a safe, protected passage for your electrical lines.
Working with fully established retaining walls presents another common structural challenge during retrofitting projects. If the capstones are already permanently glued down, you will need a masonry saw with a diamond blade to cut small, discreet grooves for the fixture wires. This dusty process requires patience and proper safety gear, including protective eyewear and a high-quality respirator mask.
Thick tree roots can also complicate the trenching process for your main wire run. Dig carefully around large roots rather than cutting through them, which could potentially harm or kill a mature tree. Fortunately, burying low-voltage wire just 6 inches deep meets standard safety requirements, minimizing the necessary excavation depth and protecting your landscaping.
Long-Term Maintenance and Care
Regular maintenance guarantees your landscape lighting system continues to perform beautifully year after year. Dirt, hard water stains, and mineral deposits will eventually accumulate on the delicate glass lenses of your fixtures. Cleaning these lenses every few months with a soft cloth and mild soap restores the original light output and keeps the illumination looking crisp.
Plant growth frequently interferes with the intended spread of light across your hardscaping features. Overgrown bushes and trailing vines can completely block a fixture, rendering it entirely useless during the evening. Trimming back nearby vegetation keeps the light focused exactly where you want it.
Finally, inspect your wire connections and transformer operation at the beginning of every spring season. Frost heave during freezing winter months can sometimes push buried wires to the surface or loosen mechanical connections. Addressing these minor issues promptly prevents them from turning into expensive electrical repairs during the busy summer season.
Bring Your Landscape to Life with the Experts
While a DIY approach to hardscape lighting can be a rewarding weekend project, achieving a truly flawless integration requires specialized tools, heavy masonry experience, and precise electrical engineering. Missteps can result in damaged stonework, uneven lighting, or short circuits that fail after the first heavy rain.
If you want to make sure your property looks spectacular without the stress, turn to the professionals. Rich’s Landscaping brings over 40 years of trusted, family-owned expertise to homeowners throughout Pennsylvania. Our skilled design and installation crews specialize in premium hardscaping elements, custom stone masonry, and professional exterior lighting systems engineered to withstand the elements and enhance your home’s long-term value.
Ready to improve your outdoor living spaces? Contact Rich’s Landscaping today to schedule a personalized design consultation and get a free estimate on your next outdoor lighting project!