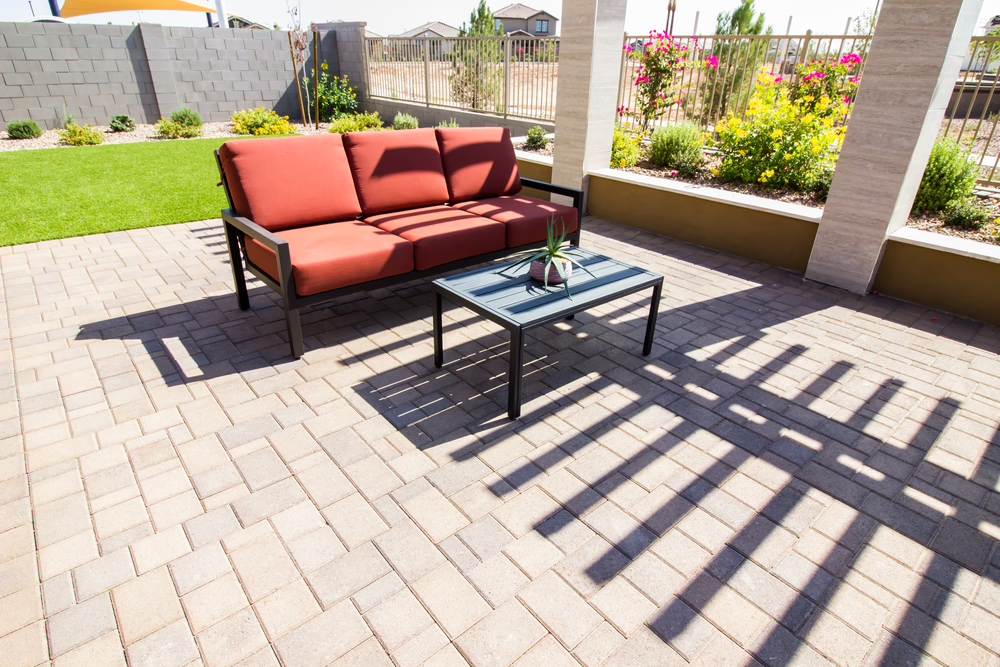
Building a premium gathering spot completely transforms a property’s utility and aesthetic appeal throughout the year. A well-designed hardscape feature creates an inviting destination for entertaining guests or enjoying quiet mornings. However, making sure that a paver patio retains its structural integrity and visual appeal over decades requires a deep understanding of civil engineering principles, material science, and precise installation techniques.
For high-end residential properties, a paver patio is an investment that offers lasting financial and functional value. To achieve maximum longevity, the installation must strictly adhere to industry standards regarding soil mechanics, excavation depths, load distribution, and drainage mitigation. This guide outlines the professional-grade phases required to construct a durable, long-lasting outdoor living space.
The Core Principles of Structural Longevity
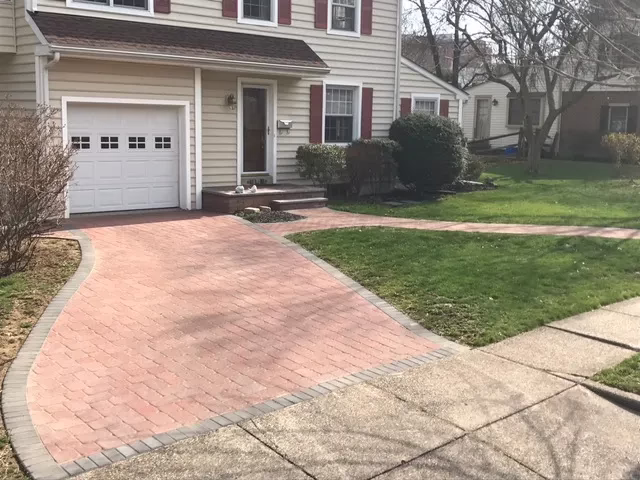
Many hardscape features fail prematurely not because of the surface materials used, but due to a failure in foundational engineering. Securing professional paver patio installation in Bucks County gives you a flexible pavement structure. Unlike rigid poured concrete, which is prone to cracking during freeze-thaw cycles, an interlocking paver system distributes loads across an interconnected network of components.
To prevent the shifting, sinking, or rutting that often plagues sub-standard installations, engineering specific structural guidelines into the subgrade is critical:
- Soil Stability: The existing subgrade must be evaluated and mechanically stabilized. Soft or clay-heavy soils lack load-bearing capacity when wet and require deeper excavation to accommodate a thicker aggregate base.
- Subsurface Drainage: Water is the primary enemy of hardscape longevity. Trapped water under a patio softens the subgrade and causes severe displacement during frost heaves.
- Lateral Restraint: An interlocking system requires constant horizontal pressure to maintain its integrity. Without rigid perimeter containment, the outer boundaries will inevitably migrate outward.
Site Evaluation, Logistics, and Layout Design
Before any excavation begins, extensive site planning and engineering calculations must be finalized. Precise dimensional surveying dictates material logistics, making sure that the appropriate volumes of aggregates and paving units are delivered and staged efficiently to minimize site disruption.
Drainage Slopes and Grading
Evaluating existing water runoff patterns is a paramount prerequisite. A finished paver surface must be graded to direct water away from the home’s foundation and adjacent structures. Industry standards dictate a minimum slope of 1 inch for every 8 feet of length (approximately a 1% to 2% grade). Establishing this slope occurs at the subgrade level, not just the surface layer, making sure that water infiltrating the joints flows along the sub-base rather than pooling beneath it.
Layout Geometry and Utilities
Using commercial marking instruments and mason’s lines, paver patio contractors in Warminster establish the exact perimeter and finished elevation heights. This stage requires checking local zoning codes regarding property setbacks and impermeable surface limits. Additionally, local utility locating services must clear the site prior to excavation. Striking an underground utility line is highly hazardous and legally costly.
Choosing Architectural Patterns and Materials
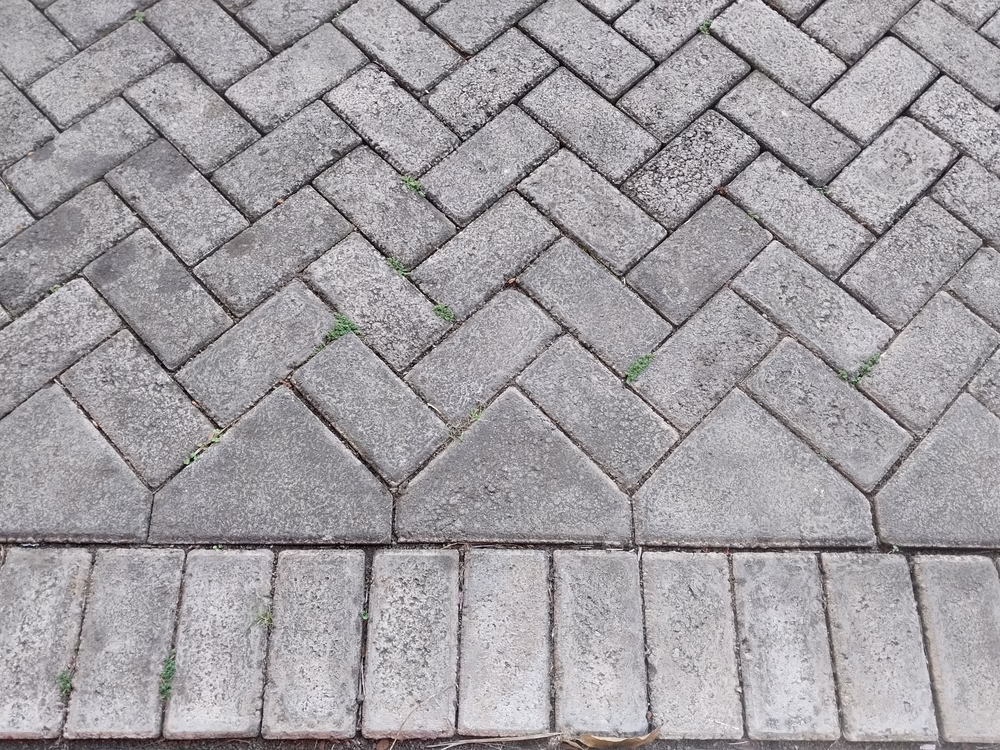
The structural performance of the surface is heavily influenced by the chosen laying pattern. Different geometric configurations offer varying degrees of interlocking strength.
The Herringbone pattern (set at either 45 or 90 degrees) provides the highest load-bearing capacity and is best suited for driveways and high-traffic patios because the alternating units distribute horizontal forces across all four axes. The Running Bond pattern offers moderate load-bearing capacity and is ideal for walkways or linear spaces seeking a clean, contemporary aesthetic. The Basketweave pattern provides low to moderate load-bearing capacity, making it a timeless choice for low-traffic seating areas.
High-density concrete pavers or premium natural stone (such as granite, bluestone, or travertine) must be selected based on the regional climate. In northern climates subjected to frequent freeze-thaw cycles, materials must exhibit low water absorption rates and high compressive strength.
Technical Specifications for Materials and Aggregates
A long-lasting hardscape relies on a precisely engineered sequence of layers. Each layer requires specific material classifications to achieve proper drainage and load distribution.
1. Subgrade Stabilization (Geotextile Fabric)
To prevent the subgrade soil from mixing with the clean gravel base, a woven or non-woven geotextile class fabric is installed directly over the excavated dirt. This segregation is critical; if raw clay or loam migrates upward into the gravel base, it compromises the structural capacity of the aggregate, leading to localized sinking.
2. The Base Layer: Crushed Stone
The primary structural component is the base material, typically consisting of ¾-inch minus crushed stone (dense-graded aggregate that includes both angular rock and fines). The angular shapes mechanically lock together under mechanical compaction, forming a rigid, semi-flexible slab. For standard residential pedestrian patios, a minimum compacted base depth of 4 to 6 inches is mandatory.
3. The Bedding Layer: Screeded Sand
Directly above the compacted gravel base sits a uniform, 1-inch layer of washed concrete sand (ASTM C33 specification). Fine, rounded play sand or stone dust must be avoided; stone dust traps moisture and breaks down over time, while concrete sand features sharp, angular grains that lock into the joints on the underside of the pavers when compacted.
Professional Execution: Excavation to Surface Compaction
- Precision Excavation and Subgrade Compaction: Excavation depth is calculated by adding the thickness of the paver unit, the 1-inch bedding sand layer, and the required 4-to-6-inch aggregate base. All organic matter, including turf, roots, and topsoil, must be entirely removed until stable subsoil is reached. Once the raw earth is excavated to the proper grade and slope, a commercial reversible plate compactor is deployed to densify the subgrade.
- Layered Base Compaction: The crushed stone base cannot be dumped and compacted all at once. It must be applied in lifts of no more than 2 inches at a time. Each lift is thoroughly wetted to optimum moisture content and run over multiple times with a heavy-duty plate compactor achieving high density. A properly compacted base should ring when struck with a sledgehammer, indicating that the individual stones have mechanically locked.
- Advanced Screeding Techniques: To achieve a perfectly smooth bedding layer without altering the pre-established drainage slope, professional installers utilize screed rails (typically 1-inch diameter steel pipes) set directly onto the compacted base. Concrete sand is distributed over the area, and a hardened aluminum straightedge is drawn across the rails. Once the sand is screeded to a perfect 1-inch depth, the rails are pulled out, and the remaining voids are carefully backfilled with sand using a hand trowel. This sand bed must remain entirely undisturbed; walking on the screeded sand before the pavers are set destroys the uniform density, leading to an uneven surface.
Paver Placement, Edging, and Interlocking Mechanics
Following the preparation of the base, we carefully lay each unit, secure the borders, and sweep joint sand to lock the system in place.
Precision Alignment and Cutting
Installers place pavers directly onto the sand bed, typically starting from a fixed 90-degree corner or an established structural wall. Pavers are lowered vertically into place rather than slid horizontally, preserving the integrity of the sand bed. A mason’s string line is pulled every few feet to monitor layout squareness and correct minor deviations in real-time.
At the perimeters, where full units cannot fit, measurements are taken for precision cuts. These cuts are executed using industrial, water-cooled diamond-blade masonry saws. Wet cutting achieves crisp, clean edges that minimize joint gaps, which is essential for maintaining the lateral interlocking pressure of the system.
Heavy-Duty Perimeter Edge Restraints
Before the joints are filled, structural edge restraints are anchored around the entire open perimeter. For maximum longevity, industrial-grade PVC or aluminum profiles are secured into the compacted aggregate base using 10-inch steel spikes spaced no more than 12 inches apart. Concrete curbing troweled directly onto the aggregate base can also serve as a permanent structural border.
Joint Stabilization with Polymeric Sand
The final mechanical step transforms individual loose blocks into a monolithic, interlocking structural unit:
- Initial Sweep: Specialized polymeric sand, a blend of graded sand and proprietary polymer binders, is swept across the dry surface until all joints are completely filled.
- Mechanical Consolidation: A plate compactor equipped with a protective polyurethane pad is driven over the entire patio surface. This vibration forces the pavers down into the angular bedding sand below, while simultaneously settling the joint sand deep into the gaps.
- Secondary Sweep & Activation: More sand is added to fill the remaining voids to within 1/8 inch of the paver chamfer, and the excess is meticulously leaf-blown off the surface.
- Hydration: The entire patio is lightly misted with water in controlled stages. This moisture activates the polymers, causing the sand to cure into a flexible, rubber-like barrier that resists weed growth, insect intrusion, and water erosion while allowing the system to flex naturally under thermal expansion.
Long-Term Maintenance and Preservation
While an engineered paver patio is exceptionally durable, routine preventative care preserves its aesthetic and structural integrity over the decades.
- Routine Cleaning: Organic debris, leaf litter, and dirt should be regularly blown or swept off the surface to prevent organic staining and tannin buildup.
- Joint Inspection: Every few years, inspect the polymeric sand joints. If severe weather or pressure washing has eroded sections of the joint stabilizer, the area should be cleared of debris, dried, and topped off with fresh polymeric sand to maintain lateral tension.
- Applying High-Performance Sealers: Applying a breathable, UV-resistant deep-penetrating solvent or water-based sealer every 3 to 5 years protects the concrete or natural stone from oil spills, salt damage, and color fading. Sealers are available in natural, matte, or wet-look finishes, and they significantly ease the process of pressure washing down the road.
Partner with the Precision Installation Experts
Achieving a flawless, level hardscape that successfully resists shifting, sinking, and erosion requires industrial machinery, specialized surveying equipment, and decades of structural expertise. Mistakes made during the initial excavation and base compaction phases cannot be easily fixed once the surface is complete, often requiring a total tear-out.
To make sure your outdoor investment is engineered correctly from the subgrade up, trust the professional installation teams at Rich’s Landscaping. Our crews utilize premium aggregates, precision commercial compactors, and industry-leading techniques to deliver breathtaking, high-performance patios built to last a lifetime. Contact Rich’s Landscaping today to schedule a complete site evaluation and consultation for your upcoming hardscape project.